Production of stickers, adhesive labels

We provide production services of printed and plotted stickers in small and large quantities. We can help you with design preparation - we will make sure that the files are ready for accurate color rendering.
We print with professional Japanese Roland printers and environmentally friendly eco-solvent paints. We use not only the usual CMYK, but also additional light ink cartridges for wide and bright reproduction of colors and transitions - we are focused on high print quality. We choose only good quality paper so that the produced stickers can last perfectly in various conditions.
Application
Production of labels for packages.
Placing advertisements on shop windows.
For pasting car advertisements.
For wall and floor decoration.
For covering details.
For labeling products.
For marking premises.
To increase brand visibility.
Why choose us?
- We use high-quality paints that are resistant.
- We have a variety of films. I.e. films can be white, transparent, colored, with various textures. They can also be matte or glossy.
- We adapt the film according to the purpose of the sticker, we advise.
- We can select the most optimal film according to the available budget.
- For an additional price, we make layouts or organize files for the production of stickers.
- We can prepare advertising, graphic visuals.
- We provide sticker gluing and wrapping service. We can come to the location.
- We also produce in small quantities.
- According to the agreement, we can cut the stickers one by one or roll them up.
- We can send the produced stickers in a variety of ways.
File requirements
A .pdf file with cutting lines is required for production. It can also be a pixel file, but ideal quality requires a vector. The cutting line must be registered under the name "CutContour" with selected CMYK color and Spot Color mode.
Ideal formats: PDF, AI, EPS, SVG, CDR (in CMYK color mode) Texts must be skewed. Otherwise, the text displayed to the customer and the manufacturer may differ. If you don't have a vector - the following formats are also available: JPG, TIF, PNG. (in RGB color mode)
The best quality is extracted from vector files - we get a more detailed image, sharper lines.
Production process
Although the same wide-format printer is used, the process of making stickers is somewhat more complicated than that of posters or canvases. The size of the stickers, the detail of the print, the cutting line, the color intensity, etc. are of great importance.
-
We are preparing the file for printing and plotting (cutting). Using special programs for working with vector files, we put a cutting line (CutContour). If we have a file sent by the client with a cutting line - we open it and check whether the file is in order.
-
After making sure that we have the right files, we select the desired sticker roll. We put it on the device.
-
Let's start printing stickers. Since our device has an integrated plotter, we can cut stickers without removing the roll. As a result, we obtain more precise cutting lines than using two separate devices.
-
The printed sticker dries from 1 to 10 minutes. Then the next stage takes place - cutting. The drying time depends on the type of sticker and the intensity of the colors. We print in sections from 20 cm to 100 cm. We choose the length of the section according to the complexity of the cutting line and the size of the sticker. We print round, small and other complex stickers in smaller sections to get the smallest possible cutting error - we are focused on quality.
-
After printing and plotting the stickers, we transfer the roll or the cut sections to the work table. We peel off the unnecessary part of the stickers and according to the agreement with the customer, we cut and pack the stickers for collection or shipping.
The prices of prints and clothes are negotiated individually. We will advise you, help you choose clothes that meet your needs in a short time and choose the most optimal printing method.
You can inquire about prices and deadlines:
+37063077733 arba [email protected]
.jpg)
.jpg)
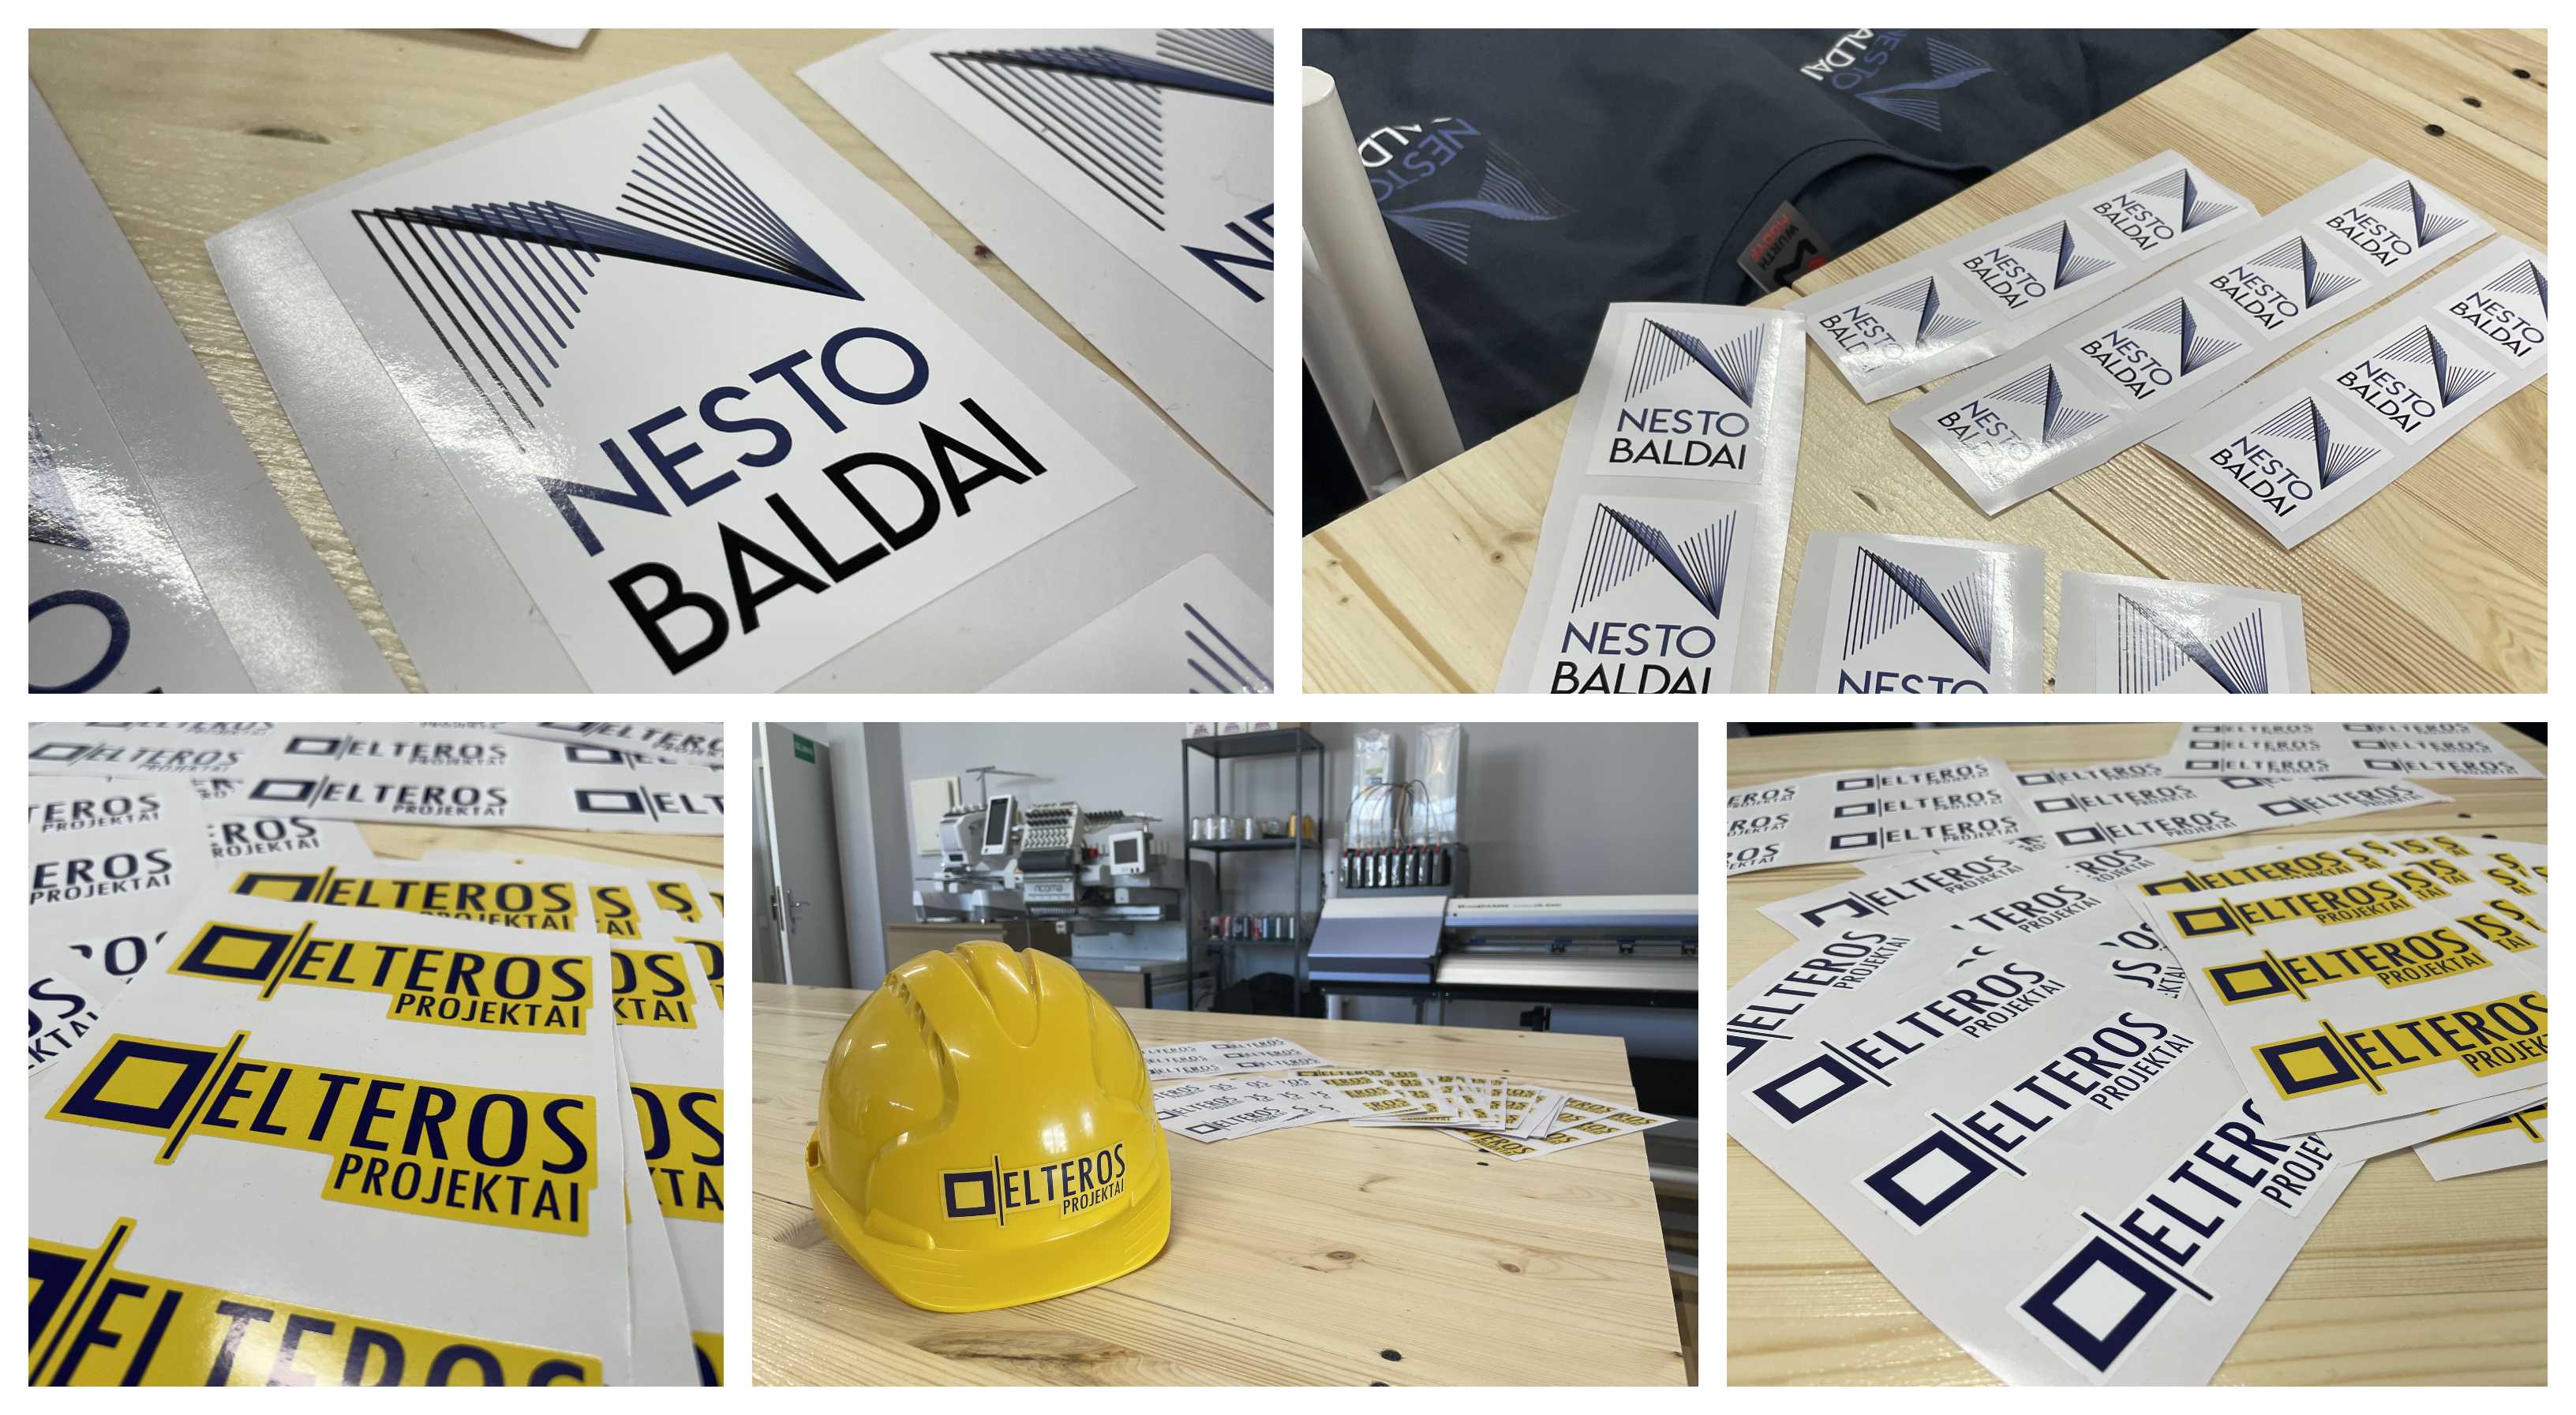
.jpg)
.jpg)
.jpg)
.jpg)
.jpg)
How to stick stickers?
Pasting of advertisements, texts, logos inside or outside, pasting of car advertisements.
1. We clean the glued surface from significant dirt and degrease it.
By properly removing the grease from the surface, you can ensure that the sticker will last a long time and will not start to peel off.
One of the following can be used for cleaning:
-Window cleaning products
-Soapy water
-Water with dishwashing liquid
-Spirit cleaners, isopropyl alcohol
2. Wet gluing is much easier for an inexperienced user. We recommend choosing this one
method if you have less knowledge or use stickers without air gaps. Prepare the liquid that will be sprayed on
adhesive surface and sticker. Perfect for this:
-A mixture of water (75-85%) and car window washer fluid (15-25%).
-A mixture of water (70-80%), isopropyl alcohol (5-10%) and liquid soap/dishwashing liquid (5-15%).
-Special liquid for gluing stickers. You can purchase from promotional material suppliers or online.
A mixture of water, alcohol and a degreasing alkaline cleaner is required for good results.
Water and a cleaning agent make it easier to dislodge the water, while the rubbing alcohol helps the water while the sticker is drying
get away.
3. We spray the prepared liquid abundantly on the surface to be glued.
4. We remove the lower, paper film from the sticker. Use an extra person for this job.
If a plastic carrier is used, we spray the liquid on the inside of the sticker while removing the film. Also
spray liquid on the inside of a solid sticker (without carrier).
If it is a paper carrier, we do not wet the inside of the sticker.
Avoid touching the stickers. If there is no other option - at least make sure that the sticker is sprayed in that place
liquid or wet your fingers. (Also, you can use special gloves without fluff for sticking stickers –
then touching the sticky side will have no effect)
When removing the protective film, try not to touch the adhesive side of the sticker or touch other surfaces.
Do this by holding the sticker upright or upside down on a clean surface. Stickers dry to the touch
the grease from your fingers on your hands will stick and reduce the stickiness of the sticker - it's likely that after a while the sticker will
will begin to peel exactly from the place where it was touched.
5. We put a sticker on the surface to be glued. Because the fluid is used, you get the freedom to change the position.
You can push or move the sticker several times before pushing the water out.
6. After making sure that you have chosen the correct position of the sticker, you can start pushing the water out.
For this you will need one of the tools:
-It would be ideal to have a dedicated squeegee with a soft edge.
-You can use a bank card out of trouble. Protect the surface of the sticker from scratches - hold the card in your arms
thin, lint-free fabric.
7. Push the water out by swiping from the center to the sides. This technique will help you avoid bubbles in the middle
sticker Make the first swipes gently, take it easy. You will see the water being pushed out with the air.
Repeat pushing with increasing pressure until most of the water/air bubbles are removed.
Since you are gluing wet, don't be afraid if some hard-to-remove bubbles remain. Most likely
they will disappear in 1-2 weeks.
The stickiness of the sticker will begin to return after an hour, so if the corners are difficult to stick to or the sticker can be moved
don't survive. Give it time to dry and then after a longer time you can press the loose areas.
The glue will strengthen significantly after a day, and it can take up to a couple of weeks to achieve full adhesion.
8. Carrier removal.
A carrier is used for texts or other stickers consisting of details.
This can be paper or plastic (pvc).
-If you have a sticker with a paper carrier, it will be easy to remove if it gets wet.
-If you have a sticker with a plastic carrier, let it sit after pushing out the water/air.
After about an hour, the water should evaporate and the carrier will be easy to remove. If you glued wet
and trying to tape off the carrier immediately after ejection will be difficult. The sticker may peel off with the carrier.
A carrier is not used for one-piece, one or several large part stickers, so after removing the liquid and air from the
the inside of the sticker remains to enjoy the result and wait for it to dry.
9. Heating. It is not necessary to heat the coated stickers if it is not required by the film manufacturer.
We also do not recommend doing this if you have time to wait at least 12 hours before using the coated item.
It is not necessary to heat ordinary advertising stickers - the adhesive surface is activated automatically when the sticker dries.
However, heat can help speed up the process. If you use a hair dryer, be careful - a heated sticker
you can damage by touching. Also, if the sticker is overheated, it may irreversibly shrink or melt.
NOTE regarding dry gluing
Dry gluing is also possible, but we recommend dry gluing only small solid stickers or
thin texts, details. Dry gluing can leave more air gaps that will not disappear over time.
If thin stickers are applied, these air gaps may be barely visible. In this case, you can speed up
gluing and do it dry. On the other hand, dry gluing increases the risk of mistakes - if you choose the wrong one
position or make a crease, it will be extremely difficult to move the sticker.
Full wrapping and gluing of the car or other parts using films with air gaps.
This method is more for people who have experience in gluing. Films with air gaps can also be glued
dry way. Air gaps allow air to be displaced without the use of water. These films are usually more expensive–
used for full covering of car parts, furniture or other items. Dry applied stickers also last longer
will remain in good condition - this can be especially important if the sticker will be in outdoor conditions.
Be careful when choosing self-covering for an important item. If you are determined to do so, take a look
online, what are the nuances of the films, their properties and the necessary conditions for gluing. In short - cars
the films used in wrapping are characterized by flexibility, elasticity and memory. Improper tension, heating,
after pushing out the film, it can change its position over time - bubbles are formed, the edges come off,
cracks etc.